&Notepad
A distributed for loop from scratch in 70 lines of Python
This is essentially a rewrite of this tutorial with added context. To run the examples, you will need Python >=2.7, pip, Docker, and the gcloud SDK. All files are in a GitHub repository: gcp-job-queue.
1. Introduction
If you deal with data, you’ve probably written Python code like this:
for i in range(1000000):
    expensive_function(i)
Where expensive_function could be downloading a video, processing a text document, computing the i-th digit of pi, who knows. These “embarrassingly parallel” for loops, or maps, run some function independently over every element of an input list. Naturally, to speed it up, we want to parallelize the computation over multiple cores of our CPU:
from concurrent.futures import ProcessPoolExecutor
with ProcessPoolExecutor() as executor:
    list(executor.map(expensive_function, range(1000000)))
However, sometimes one computer simply isn’t enough. You need more machines either to increase your computing power (e.g. for image processing) or to increase your I/O bandwidth (e.g. for file downloading). Unfortunately, while parallelizing within a single machine is a relatively small change (as above), parallelizing across multiple machines requires a substantively different workflow with much more infrastructure. While there are plenty of existing tools that perform this type of computation like Hadoop, Spark, Cloud Functions, Dataflow, and so on, setting them up can be a logistical nightmare in practice1. Additionally, they provide you varying levels of control over your environment, often restricting the dependencies you can include.
In the rest of this note, I’ll walk you through the basics of how to do this on your own using current cluster management tools.
2. The task
Let’s begin by setting up the example. Let’s say we want to download a large list of YouTube videos for some kind of video analytics task. Assume we have a file youtube-ids on our local machine, e.g. drawn from YouTube-8M:
~/Code/gcp-job-queue:master*? λ head youtube-ids
L8ndmOyqD7Q
xwNVYwbsjKY
XZkdzukrAYU
AK3xVvPq5GA
tlEgKJ9v4OQ
NYVoupC3Vio
pWaks6Jm77Y
Wxa66PN-QJE
Rsxa1cjwPM0
s6eS8cmwg_Q
For a baseline, we can write a Python script that will download the files just using our own computer. This and all following code is also available in the accompanying GitHub repository: gcp-job-queue. Make sure to pip install -r requirements.txt using the requirements provided in the repository.
# local.py
import subprocess as sp

def download_video(id):
    sp.check_call(
        'youtube-dl -f mp4 "https://youtube.com/watch?v={id}" -o {id}.mp4'
        .format(id=id),
        shell=True)

with open('youtube-ids') as f:
    ids = [s.strip() for s in f.readlines()]

for id in ids:
    download_video(id)
Note: at this point, some of you will observe, “wouldn’t this be simpler as a bash script?” For this super-simple example, yes, but this serves as a baseline for more complex processing in which you’ll want Python over bash. Also, yes, youtube-dl has a Python API, but it’s simpler just to use it as a bash command.
If we call our script, it will indeed start downloading:
~/Code/gcp-job-queue:master*? λ python local.py
[youtube] L8ndmOyqD7Q: Downloading webpage
[youtube] L8ndmOyqD7Q: Downloading video info webpage
[youtube] L8ndmOyqD7Q: Extracting video information
[download] Destination: L8ndmOyqD7Q.mp4
[download]   6.9% of 58.14MiB at  4.23MiB/s ETA 00:12
However, since this is a network-bound computation, we’re limited in the number of videos we can download concurrently. Let’s parallelize!
3. Essentials of work distribution
The main question that informs our design of a distributed for loop is work assignment: how does each machine know which part of the input array to process? The theoretically simplest assignment is static, e.g. if we have 5 machines (we’ll call them “workers” from here on) and an array of 100 items, then worker 0 gets 0..19, worker 1 gets 20..39, and so on. However, this strategy has a few problems:
- Work imbalance: our overall latency is bound by the slowest worker. if items 0..19 take much longer to process than 20..39, then we don’t reach peak efficiency.
- Worker failure: if a worker dies, then the simplest strategy to fix this is to rerun the worker on the same set of items, which could both re-compute a substantial amount of work, and also increases the overall latency of the computation. We’ll see later why it’s important to be robust to worker failure.
- Logistics: in practice, it’s actually simpler to adopt a dynamic strategy (described below), since a static assignment requires each worker to know which part of the input array is its own, which can be annoying to implement depending on your cluster management software.
Instead, we want a dynamic work assignment, where workers retrieve work on-demand from a centralized work queue. For example, in standard Python, this would be:
work_queue = list(range(1000000))

def worker():
  while len(work_queue) > 0:
    i = work_queue.pop()
    expensive_function(i)

worker()
To implement this work queue in a distributed fashion, we need something to create/manage our cluster of machines, and something to manage the work queue. For this blog post, we’re going to use Google Cloud Platform (GCP) services. Specifically, we will use Google Kubernetes Engine + Kubernetes for the cluster and Google Cloud Pub/Sub for the work queue. As with any technology in this post, you could implement the same idea using another cluster manager (e.g. Mesos), another cloud provider (e.g. Amazon/AWS), another message queue (e.g. Redis), and so on. This is a particular configuration I chose because a) I think it’s easy to setup, and b) it’s what I happen to know.
On a high level, we’ll design our application like this:

Essentially, you’ll have a host of machines managed by Kubernetes (and you will control Kubernetes from your laptop). These machines will get work from the work queue (Pub/Sub), and you will submit work to the work queue from your laptop, using it as an intermediary of communication. Now let’s dive into each piece individually.
4. Creating the work queue
While there are programmatic means of doing tasks like creating a cluster or a work queue (usually via the command line API), we’ll do everything via the UI since it’s more friendly for newcomers. First, visit the dashboard for your GCP project (you will need to create one if you have not already): https://console.cloud.google.com/home/dashboard
Note: if this is your first time using GCP, you need to authenticate your laptop to use GCP services by running
gcloud auth loginfrom the command line. If you don’t havegcloudinstalled, go back to the top of the post and install the listed dependencies.
Click the menu in the top-left and go to Big Data > Pub/Sub. Enable the API (if necessary). Click Create topic and give it a name like queue-example. You’ll have a topic listed now:
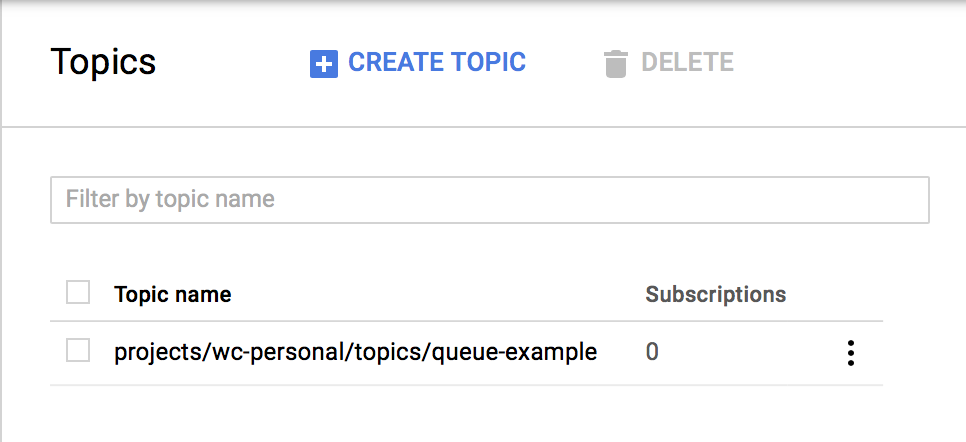
A topic is like a chat room–it describes a group of queues that you want to publish a message to. Click the topic name and then click Create subscription. Give it a name like queue-example-sub.
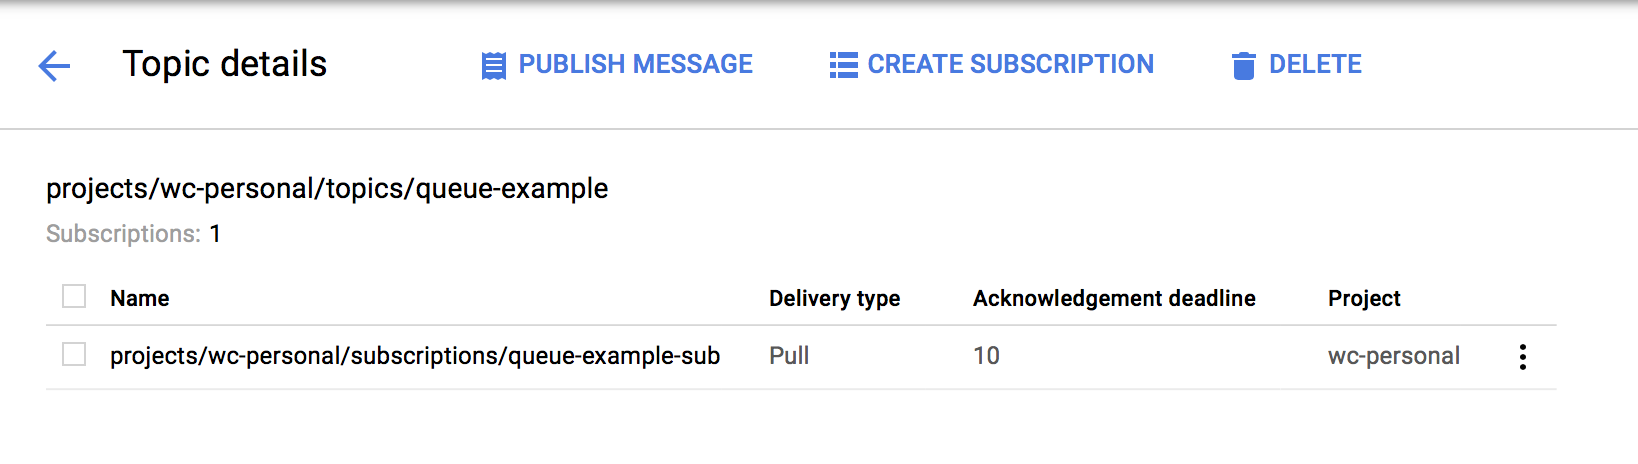
A subscription is an individual message queue. When someone publishes a message to a topic, every subscription has the message enqueued onto its individual queue. Here, we only need one topic for our computation, and we only need one subscription, since every worker should be pulling work from the same queue. Here’s an example that shows how to use the Python API to push/pull messages using the Pub/Sub queue you created:
# pubsub_example.py
from google.cloud import pubsub
from google.cloud import monitoring
import time

PROJECT = 'wc-personal'
TOPIC = 'queue-example'
SUBSCRIPTION = 'queue-example-sub'


# This is a dirty hack since Pub/Sub doesn't expose a method for determining
# if the queue is empty (to my knowledge). We have to use the metrics API which
# is only updated every minute. Hopefully someone from Google can clarify!
def queue_empty(client):
    result = client.query(
        'pubsub.googleapis.com/subscription/num_undelivered_messages',
        minutes=1).as_dataframe()
    return result['pubsub_subscription'][PROJECT][SUBSCRIPTION][0] == 0


def print_message(message):
    print(message.data)
    message.ack()


def main():
    client = monitoring.Client(project=PROJECT)

    # Publishes the message 'Hello World'
    publisher = pubsub.PublisherClient()
    topic = 'projects/{}/topics/{}'.format(PROJECT, TOPIC)
    publisher.publish(topic, 'Hello world!')

    # Opens a connection to the message queue asynchronously
    subscriber = pubsub.SubscriberClient()
    subscription = subscriber.subscribe('projects/{}/subscriptions/{}'.format(
        PROJECT, SUBSCRIPTION))
    subscription.open(print_message)

    # Waits until the queue is empty to exit. See queue_empty for more
    # explanation.
    time.sleep(60)
    while not queue_empty(client):
        pass
    subscription.close()


if __name__ == '__main__':
    main()
5. Creating the cluster
Now that we have a working message queue, the next ingredient is to setup our cluster. Go to Compute > Kubernetes Engine in the GCP dashboard from before. Click Create cluster.

Give your cluster a name (e.g. example-cluster). Set the size (number of machines) to 1. Leave the rest of the settings as given, and click Create. After a few minutes, this will create a cluster containing 1 machine. This machine is just there to serve as the Kubernetes master node, i.e. a place for Kubernetes to help you manage the rest of your cluster.
Once the cluster is created, click on its name and then click Edit.

Scroll to the bottom and click Add node pool. Set a few options:
- Set Name to
workers. - Set Autoscaling to On.
- set Minimum size to 0.
- Set Maximum size to your desired number of workers (we’ll use 3 for this example).
- Set Preemptible nodes to Enabled.
Then click Save.
Why all this complexity in having two separate sets of machines? It’s all about the money. Remember that you’re paying for all this. It turns out that if you use “preemptible” nodes, they’re 4-5x as cheap as normal nodes (see: Google Compute Engine Pricing). A preemptible instance is equivalent to an AWS spot instance–it’s a machine that you rent with the understanding that Google can kill it at any time. If your application can be robust to random failures (i.e. if it is fault tolerant), then you can save a lot of money!
And, thankfully, with the system design we’ve chosen, we get fault tolerance for free due to a particular aspect of Pub/Sub. Recall that in the earlier example, when a worker receives a message, it has to acknowledge it:
def print_message(message):
    print(message.data)
    message.ack()  # <- acknowledgement
The way Pub/Sub works is that if a worker pulls a message but does not acknowledge it, then the message will be re-queued after a fixed (but configurable) length of time. For our expensive computation, we want to wait to acknowledge the input (the message) until after the computation is complete. This ensures that if the worker dies in the middle of a computation, the message will be re-queued, and no input is lost.
To sum up, we now have a cluster with one machine for Kubernetes, the cluster manager, and a variable number of machines for workers. The worker machines are preemptible, meaning they can disappear at any moment, but we don’t worry about failures since our system design can handle failures. Lastly, note that we enabled autoscaling for the worker pool–this means that when a worker dies, Kubernetes will automatically reallocate a new worker for us to replace it. Additionally, when our job is done, Kubernetes will automatically deallocate all the worker machines, minimizing costs.
6. Preparing our program
Now all the resources are in place–we have our work queue and our cluster ready to go. Next, we need to change our original script to use the new Pub/Sub work queue. First, we need a new script master.py that we’ll run locally and will submit work into the work queue:
# master.py
from google.cloud import pubsub
from tqdm import tqdm

PROJECT = 'wc-personal'
TOPIC = 'queue-example'


def main():
    with open('youtube-ids') as f:
        ids = [s.strip() for s in f.readlines()]

    publisher = pubsub.PublisherClient()
    topic = 'projects/{}/topics/{}'.format(PROJECT, TOPIC)
    for id in tqdm(ids):
        publisher.publish(topic, id)


if __name__ == '__main__':
    main()
This script goes through every ID in our file youtube-ids and publishes them to the topic we chose earlier. You can just run this script from your laptop:
python master.py
Once it completes, your queue has been filled to the brim with IDs ready for downloading. Next, we need to create the script we’ll run on each worker:
# worker.py
from google.cloud import pubsub
from google.cloud import monitoring
import subprocess as sp
import time

PROJECT = 'wc-personal'
TOPIC = 'queue-example'
SUBSCRIPTION = 'queue-example-sub'
BUCKET = 'wc-personal-test'


def queue_empty(client):
    result = client.query(
        'pubsub.googleapis.com/subscription/num_undelivered_messages',
        minutes=1).as_dataframe()
    return result['pubsub_subscription'][PROJECT][SUBSCRIPTION][0] == 0


def download_video(id):
    sp.check_call(
        'youtube-dl -f mp4 "http://youtube.com/watch?v={id}" -o {id}.mp4 --no-cache-dir'
        .format(id=id),
        shell=True)


def copy_to_gcs(id):
    sp.check_call('gsutil mv {}.mp4 gs://{}/tmp/videos/'.format(id, BUCKET), shell=True)


def handle_message(message):
    id = message.data
    download_video(id)
    # copy_to_gcs(id)
    message.ack()


def main():
    client = monitoring.Client(project=PROJECT)

    subscriber = pubsub.SubscriberClient()
    subscription = subscriber.subscribe('projects/{}/subscriptions/{}'.format(
        PROJECT, SUBSCRIPTION))
    subscription.open(handle_message)

    time.sleep(60)
    while not queue_empty(client):
        pass
    subscription.close()


if __name__ == '__main__':
    main()
The major addition to this script is the copy_to_gcs function. Remember that we’re going to run this script on many different machines, each of which have their own disks. If we downloaded these videos to the machines and then deleted the cluster, our videos would be gone! All that effort for nothing. Instead, we need the workers to download their videos into a single storage system. Here, the simplest approach is to use Google Cloud Storage (GCS), which is Google’s geo-distributed file system. You can download/upload files to it from anywhere, so it’s a perfect location for us to store our videos.
To perform the move, we first need to create a location (or bucket) to store our videos. In the GCP dashboard, go to Storage > Storage and click Create bucket. Give it a name like example-bucket, except be more creative since they have to be globally unique.

To move videos into our created bucket, we use the gsutil command line tool. In the script above, it looks like:
gsutil mv <SOME VIDEO.mp4> gs://<YOUR BUCKET>/
This acts just like the normal mv utility on Unix-based systems, except that it moves the file from the worker’s local file system to Google’s remote file system.
7. Packaging our program
Now that our script is ready, the question is: how are we supposed to run our code on all these workers? For this, we care about three things:
- The environment: our code has dependencies, e.g. youtube-dl, that we need to ensure are installed on all the nodes.
- The code: the scripts themselves need to be copied to all the nodes so we can run them.
- The execution: something need to actually ssh into these nodes and hit “go” so the scripts run.
You could imagine that in an older time, you would have to use some combination of semi-scripted ssh and scp to accomplish these tasks. However, today there is a much better solution: containers (specifically Docker). Docker allows us to bundle up our code, its dependencies, and the way to run it into a single file. To do this, we define Dockerfiles, or reproducible build scripts, that we build into images, or templates of our code that we can stamp out. An instance of an image is a container, which is usually a single copy of your program. For this example, each worker will run one container, which in turn runs your script.
To build a Docker image, we create the following Dockerfile:
# Dockerfile
FROM ubuntu:16.04

RUN apt-get update && apt-get install -y python-pip curl
RUN pip install youtube-dl google-cloud-pubsub

RUN echo "deb http://packages.cloud.google.com/apt cloud-sdk-xenial main" | \
    tee -a /etc/apt/sources.list.d/google-cloud-sdk.list && \
    curl https://packages.cloud.google.com/apt/doc/apt-key.gpg | apt-key add - && \
    apt-get update && apt-get install -y google-cloud-sdk

WORKDIR /app
COPY worker.py service-key.json ./
ENV GOOGLE_APPLICATION_CREDENTIALS=/app/service-key.json
RUN gcloud auth activate-service-account --key-file=$GOOGLE_APPLICATION_CREDENTIALS
CMD python worker.py
I won’t explain the Dockerfile in too great detail–it uses Ubuntu 16.04 as the base image, installs a few dependencies including the gcloud SDK, and sets the command run when the container is created to python worker.py. However, there is one critical detail: any of our operations that uses Google services (Pub/Sub, Storage) must be authenticated. You don’t want to manually login from each of your nodes, so instead you need a service account as well as a service account key to include in your Dockerfile. To do so, run this from the command line in the same directory as your code files:
gcloud iam service-accounts create example-account
gcloud projects add-iam-policy-binding $(gcloud config get-value project) \
    --member serviceAccount:example-account@$(gcloud config get-value project).iam.gserviceaccount.com \
    --role roles/editor
gcloud iam service-accounts keys create service-key.json \
    --iam-account=example-account@$(gcloud config get-value project).iam.gserviceaccount.com
This creates a service account example-account and generates a key service-key.json. WARNING: keep this key safe. Never commit it to a repository. If it goes up on GitHub, you will have Bitcoin miners spawned on your account within minutes (trust me, I know this from experience).
With the Docker setup ready to go, the last thing to do is build and push the image:
docker build -t gcr.io/$(gcloud config get-value project)/worker .
gcloud docker -- push gcr.io/$(gcloud config get-value project)/worker
This pushes the image to the Google Container Registry, a private location (so no one can access your key embedded in the image), but one accessible from your Kubernetes cluster. If you want to debug your container before running it on the cluster, you can always run a copy of it locally:
docker run -t gcr.io/$(gcloud config get-value project)/worker
8. Running on the cluster
With our Docker image at the ready, next we need to deploy it to all the workers on our cluster. Rather than doing this manually (e.g. ssh into the node and run Docker ourselves), this is the primary task we will delegate to Kubernetes. To start, we first need to download the kubectl command line tool that lets us talk to Kubernetes. You can do this with:
gcloud components install kubectl
Then we need to authenticate to the previously created cluster, which we can do with:
gcloud container clusters get-credentials example-cluster
To get quick overview of our cluster, we can look at the Kubernetes dashboard. First, in a new tab (or in the background), run:
kubectl proxy
Then in your browser, visit http://localhost:8001/ui. Click on Cluster > Nodes in the sidebar.

Awesome! We’re plugged in to the cluster. Next, we want to tell Kubernetes to create a copy (container) of our Docker image on every worker (node). For that, Kubernetes needs a YAML description of the Job that we want to run (a Job being containers that shouldn’t run forever, unlike a web server):
# job.yaml
apiVersion: batch/v1
kind: Job
metadata:
  name: dl-videos
spec:
  parallelism: 3
  template:
    metadata:
      name: dl-videos
    spec:
      containers:
        - name: worker
          image: gcr.io/<YOUR PROJECT ID>/worker
          imagePullPolicy: Always
          resources:
            requests:
              cpu: 0.51
      restartPolicy: OnFailure
This file essentially says that we want to create 3 copies of the worker container, each should get scheduled onto its own node, and they should until completion. We tell Kubernetes to create this job:
kubectl create -f job.yaml
…And at long last, our script should be running! In the Kubernetes dashboard, go to Workloads > Pods to see a list of your containers.

Note: if your machines only have 1 CPU, I’m not sure how to get Kubernetes to schedule the pods separately onto each machine, since it appears that at least one of them has an additional pod (heapster) that takes enough resources such that a 0.5 CPU request fills up the machine, despite not exceeding the CPU capacity. Using a CPU request less than 0.5 runs the risk of scheduling two onto the same machine. If you know the solution, please let me know.
Sometimes the logs (stdout of the container) show up in the Kubernetes dashboard (haven’t gotten a handle on why/why not), in which case you can click on the link for a pod and view them. If not, you can use the command line interface:
~/Code/gcp-job-queue:master*? λ kubectl get all
NAME             DESIRED   SUCCESSFUL   AGE
jobs/dl-videos   <none>    0            13m

NAME                 READY     STATUS    RESTARTS   AGE
po/dl-videos-b07kn   0/1       Pending   0          13m
po/dl-videos-g4pt2   1/1       Running   0          13m
po/dl-videos-t0xkz   1/1       Running   0          13m
~/Code/gcp-job-queue:master*? λ kubectl logs po/dl-videos-g4pt2 | tail
[download]   3.9% of 6.41MiB at  6.74MiB/s ETA 00:00
[download]   7.8% of 6.41MiB at 10.35MiB/s ETA 00:00
[download]  15.6% of 6.41MiB at 16.89MiB/s ETA 00:00
[download]  19.8% of 40.37MiB at 19.48MiB/s ETA 00:01
[download]  31.2% of 6.41MiB at 17.72MiB/s ETA 00:00
[download]  60.5% of 99.58MiB at  2.56MiB/s ETA 00:15
[download]  62.4% of 6.41MiB at 16.90MiB/s ETA 00:00
[download]  29.7% of 40.37MiB at 19.60MiB/s ETA 00:01
[download] 100.0% of 6.41MiB at 17.24MiB/s ETA 00:00
Once your queue is empty, the workers will finish, the job will exit successfully. Lastly, to access the videos you downloaded, they’ll be sitting in your bucket:
~/Code/gcp-job-queue:master*? λ gsutil ls gs://wc-personal-test/tmp/videos/ | head
gs://wc-personal-test/tmp/videos/zsdpslSuhgo.mp4
gs://wc-personal-test/tmp/videos/L8ndmOyqD7Q.mp4
gs://wc-personal-test/tmp/videos/xwNVYwbsjKY.mp4
gs://wc-personal-test/tmp/videos/XZkdzukrAYU.mp4
gs://wc-personal-test/tmp/videos/AK3xVvPq5GA.mp4
gs://wc-personal-test/tmp/videos/tlEgKJ9v4OQ.mp4
gs://wc-personal-test/tmp/videos/NYVoupC3Vio.mp4
gs://wc-personal-test/tmp/videos/pWaks6Jm77Y.mp4
gs://wc-personal-test/tmp/videos/Wxa66PN-QJE.mp4
gs://wc-personal-test/tmp/videos/Rsxa1cjwPM0.mp4
gs://wc-personal-test/tmp/videos/s6eS8cmwg_Q.mp4
And you can copy them to your own machine if you like.
~/Code/gcp-job-queue:master*? λ gsutil cp gs://wc-personal-test/tmp/videos/zsdpslSuhgo.mp4 .
Copying gs://wc-personal-test/tmp/videos/zsdpslSuhgo.mp4...
\ [1 files][ 19.6 MiB/ 19.6 MiB]
Operation completed over 1 objects/19.6 MiB.
That’s it! You’ve successfully parallelized a Python for loop over a cluster of machines using Docker, Kubernetes, and Pub/Sub. And once you’ve gone through the setup the first time, it’s much more painless for subsequent tasks. Also, if you run into any trouble during these steps, please let me know so I can update this tutorial.
-
I say this, of course, and proceed to write an enormous blog post detailing all the infrastructural challenges of doing it yourself. The irony is not lost on me, I assure you. ↩